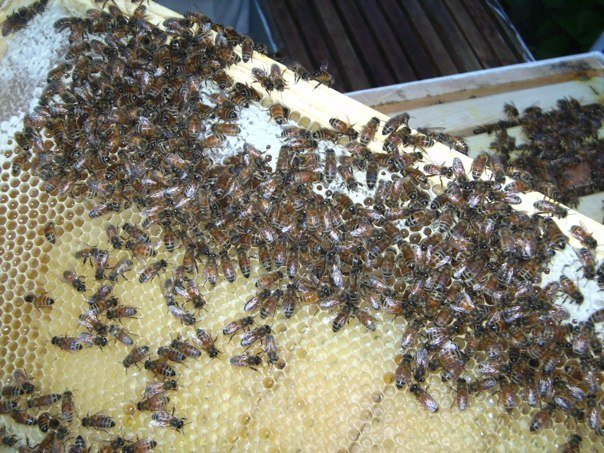
Honey has a long history in human societies around the world. It is used in various foods and beverages as a sweetener and flavoring. What is more interesting is that it also has a role in religion and symbolism sometimes being called the nectar of the gods. It is also used in various medicinal traditions to treat ailments. In fact recent studies of honey have indicated that these traditional uses actually have scientific merit. Antibacterial properties of honey are the result of the low water activity causing osmosis, hydrogen peroxide effect, high acidity, and the antibacterial activity of methylglyoxal. Because of all of that honey makes an excellent face mask.
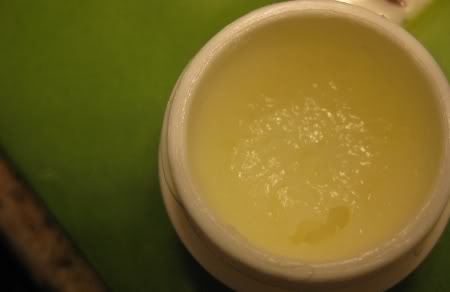
To get the most out of your honey mask, you will want to add an exfolient to the honey. I have always found that adding sugar to the honey is ideal because of the small size of the sugar grains and the fact that the sugar dissolves and washes away cleanly with just simple water. The ratio is up to you but a nice ratio of honey to sugar is 2-1. You want to wait to make the honey-sugar mix until you are ready to scrub your face as some of the sugar will dissolve in the honey if you put it in beforehand. Once you have scrubbed you face with the honey-sugar mix, let the honey sit on your face and go to work on your pours and any acne you might have. When you are done a simple wash of water will clean off the goopy mess and you will be left with a radient face.
There are a lot of different things you can do with the various oils that are used in soap making. One of the easiest things is to turn a few of the best oils into an emulsion for a lip-balm or body moisturizer. The process really is simple and actually has fewer steps than making your own soap.
For anyone who has made a salad with an oil and a liquid, you know how oil and water can be combined into a new product. The basic process is to melt the solid oils and add them to the fluid oils. Once you have combined the oils then you can start adding different flavors or sweeteners (like honey) which have water in them. If you just want the lip balm to be plain, just add water. At this point you need to stir the fluid/water vigorously as you slowly drizzle the oil into the mixture. This should create the perfect emulsion and you will be able to chill the emulsion to form an even more solid lip balm.
The processes of making soap are all centered around the chemical process of saponification. Soap makers have for years had huge lists of SAP (saponification) tables that describes the basic process of converting fats into soap. For new soap makers, the process may seem almost like magic because of all the mathematical formulas and conversions. Really, what every soap maker is doing when he or she makes a batch of soap is stepping into an organic chemistry lab and forcing a chemical reaction to take place.
The Chemicals Involved
The basic ingredients in any batch of soap are a strong base (lye, caustic potash, etc), water and an oil of some kind. When you put the lye into water, the water molecules ionize the bond between the sodium and hydroxide forming: Na+(aq) + OH–(aq). The final ingredient is where the complexity and the artistry of soap making enters the equation. Most oils are comprised of triglycerides. This basically means that oils are made up of three fatty acids with a glycerol backbone. The glycerol molecule has three hydroxyl (HO-) groups. Each fatty acid has a carboxyl group (COOH), a central long unbranched aliphatic chain (saturated (CH2)n or unsaturated (CH2)nCH=CH(CH2)n) and an omega carbon at the end that has 3 hydrogens (CH3). It is in the middle chain that the properties of the oil come from. Because of the limitless number of repeats and configurations of this middle chain, there are literally an unknown number of fatty acids in the world. Fortunately for us, when mother-nature finds a formula she likes, she reproduces it quite a bit in different places. The most common fatty acids that make up vegetable and animal lipids (at least the ones soap makers are interested in) are Lauric, Linoleic, Linolenic, Myristic, Oleic, Palmitic, Ricinoleic and Stearic acids. So, it are these three ingredients, when broken down to their base molecules, that form the palette for a bar of soap.
The Saponification Reaction
As any kid playing with vinegar and baking soda knows, when you mix an acid and a base together, you get a reaction. When soap makers mix their lye water into a vat of oil, what they are doing is really just this simple process of mixing a base with an acid. The first thing that takes place, is that the hydroxide (OH–) attacks the carboxyl group of the fatty acid which is attached to the glycerol. This causes the carboxyl to break away and form carboxylic acid. The lye base is attracted to the carboxylic acid and forms a salt with the aliphatic chain hanging off the side. At this point a single molecule of “soap” has been formed. This chemical reaction continues until all the lye or fatty acids are spent. Soap makers can play with this knowledge and discount/superfat the soap. That is to say, they can reduce the amount of lye they add to the oils so that the reaction stops before all of the oil has been converted to soap. While this saponification process is going on, a lot of heat is released during each of the reactions. This is why soap goes through a “gel” phase before it hardens into its final product.
In a lot of my soap making videos, I simply show myself adding a particular fragrance to the soap without explaining much about the different options there are to making your soap smell like it just came out of a designer spa but at a far cheaper price. In this article I hope to explain some of the basics to adding fragrance to your soap so that you can feel more confident to experiment with your own scents as you join the wonderful community of soapmakers.There are basically two chances you will have to add fragrance to your soap. The most common way is to add either a fragrance oil or a pure essential oil to your soap. The second way in which to add scent to your soap is to use various aromatic liquids like tea or coffee. There is a third way that is sometimes suggested by adding herbs or flowers to your soap but I have never had much luck with this method and if the cuttings are not heat safe, you will find most of the time they end up being burned by the saponification process.
Fragrance Oil vs Essential Oil
There is a long debate in the soap making community between those that use fragrance oils and those that use essential oils to scent their soap. The basic difference is that one is considered synthetic and the other is considered natural. In the United States fragrance oils are formulas or special combinations of chemicals or essential oils that produce a unique scent and can be protected by the FDA. On the other hand essential oils are tend to be a single ingredient that is extracted from a plant or other piece of verdure. Because the ingredients are known the essential oils tend to be considered more natural. The decision to use either material is really up to you but here are some of the facts you will need to know for soap making.
Fragrance Oils
Fragrance oils are by far cheaper to use and have a far wider variety of scents you can add to your soap. The drawback to using fragrance oils is that some of the oils can lead to a failed soap batch. Because the ingredients are often not disclosed, it is hard to tell the probability of failure of your soap when adding a new fragrance oil. That being said, I have used fragrance oils for some of my soaps and have never had a batch seize on me.
Essential Oils
Essential oils are considered more natural but the process by which they are extracted may be anything but natural. So if one of the reasons you are using essential oils is to be greener, be sure to know how the oil was extracted and be sure the plant that is providing the oil is being harvested in environmentally sustainable ways. Essential oils provide a stronger scent and often times last longer in finished soaps. If you plan on having your soap giving a room aroma for months and only on display, you’ll more than likely want to uses some combination of essential oils. Another benefit of essential oils is that they are a known ingredient and because of that the probability of a failed soap batch is known ahead of time. Unfortunately, because some plants don’t offer much in the way of oil getting your hands on some essential oils can cost an arm and a leg.Essential Oils that WorkHere is a list of essential oils that tend to withstand the saponification process quite well and come out smelling like what they did before they were turned into soap:
Almond
Cinnamon (be careful with this one)
Citronella
Cloves
Eucalyptus
French Lavender
Jasmine
Orange
Patchoili
Peppermint (this can irritate the skin)
Rose
Sage
Vanilla
How much should I use?Probably the most important question to ask is the amount to use to get the scent you want after your soap has set. This is actually a personal question for you to answer. It will depend on how the soap is being used (or not used). If the soap is merely for decoration, then you can go ahead and load it up with fragrance. On the other hand if you actually want to use the soap, you need to be aware of how the fragrance/essential oil you used will react to your skin. Having a cinnamon scented soap for general shower use might not be a good idea but having it for a foot wash would be ideal. I tend to follow the general rule that for every 30 oz of soap oil I used 1.5 to 2 oz of fragrance. I’ve found this gives me enough scent to come through the soap making process while still being easy on my skin.The next most important question is that of timing. This is actually a simple answer. Unless otherwise specified in a recipe, the fragrance (and all other additives like color, herbs or old soap pieces) right before the soap has reached full trace. Once you add the additives only a few more mixes of the soap is needed. If you mix more, there is more of a chance the things you just added will seize your soap or cause it to streak.
Liquid Scenting
Another way which you can add scent to your soap is by using a special tea or coffee as the liquid base for your soap. When you are making the liquid, you will want to make sure you make it very strong. This liquid is not for drinking and would probably taste horrible because it is so strong but what you are after are the qualities of the tea/coffee/juice as well as the scent. I’ve found that sage tea makes a good scent as well as coffee. The only thing to be aware of is that theses liquids can change the pH of the water. This will effect how your lye processes the oil. More often than not the liquid will tend to become more acidic. This in turn will cause a stronger reaction when you add the lye to your water.As you make more and more soap batches, you will become more comfortable adding fragrance to your soap and coming up with fabulously creative ideas! Good Luck!
I guess wanting to put information about the structure and function of the liver and gallbladder comes from my high school AP biology teacher. We always learned the–in this order–structure, function, malfunction, disease and treatment of any type of organ or system in the body. I’m not going to go into too much detail but if you want to skip to the liver flush just jump below
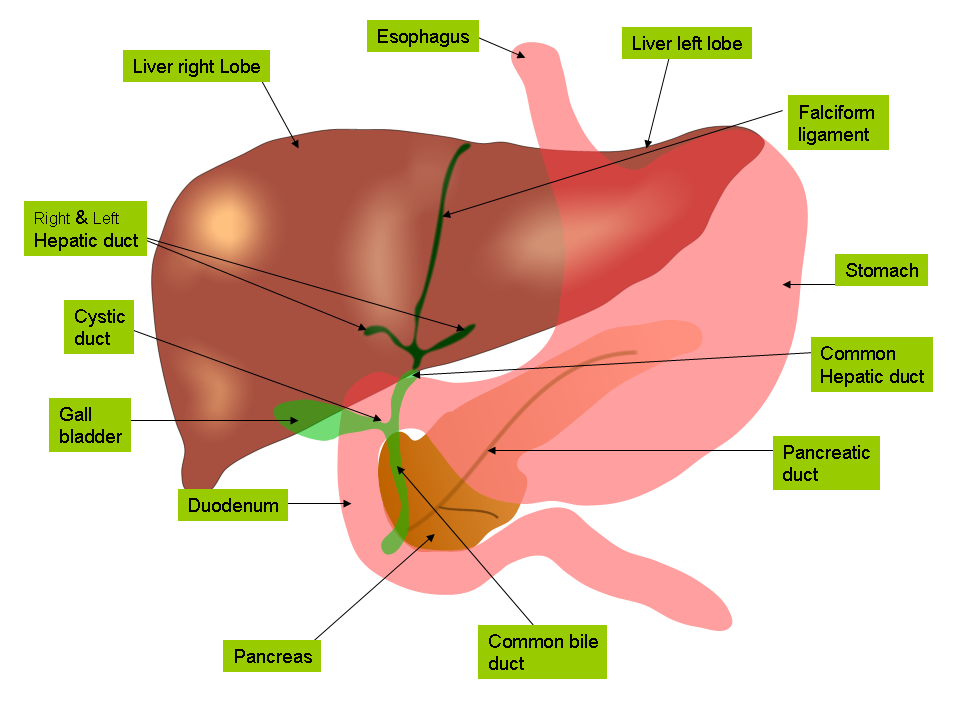
Getting to know your hepatic-biliary system
The liver is also directly connected to the small intestine via the common hepatic duct. This tube makes a stop off along the way to a small pear shape sac called the gallbladder. The gallbladder’s main function in humans is to store up bile until a meal with fat or protein is consumed and pushed into the small intestine after the stomach is finished with it. The bile is a very alkaline and not only used to help break down oils but also used to neutralize your stomach acid when it enters the duodenum (the first part of your small intestine. You can remember the parts of the small intestine by remembering the phrase “[D]igestive [J]uices [I]nside” which stands for Duodenum, Jejunum, Ileum). The gallbladder can store almost 2 oz of bile when it and the liver are functioning properly.
Problems that can occur
With all systems of the body, balance is the key to health. If something becomes out of balance–like eating too much fat or consuming too many toxins–the flawless functioning of the system breaks down. Many diseases that involve a slowing or breakdown of liver function are accompanied by jaundice (yellowing of the skin and eyes) because the liver is unable to flush out a byproduct of breaking down old red blood cell. Another problem that can occur is gallstones which is closely associated with a thickening of bile into biliary sludge. This thickening of bile is caused by particles precipitating out in the bile itself. Most often these precipitates are cholesterol crystals and calcium salts though the make-up is unique to each individual and cause of the problem. You can have biliary sludge and not even know it as this condition is often asymptotic. This sludge and the gallstones are what we are attempting to flush.
Liver Gallbladder Flush
Before you do the actual flush, you need to take a few things into consideration. If the thought of not eating 24-36 hours does not sound appealing to you or if you have a medical condition like diabetes that would risk further injury from not eating, this flush is not for you. Also, even though most epsom salts packaging give you a suggestion for recipes to take internally, some people are unable filter the Magnesium sulfate from their bodies and can become very ill. As always, if you are concerned about the effects on you that this flush will have, you will need to check with a licensed medical professional.
To prepare for the liver flush it is suggested that you do a colon and parasite cleanse the week before. These are not necessary if you have a healthy digestive tract but it never hurts to eat a little extra fiber and cut down on sugar–at least for a week. If don’t plan on doing either of these be sure to eat as healthy as you can–don’t over eat–before the flush so that your body is well prepared to fast.
You will need the following things to do a liver cleanse.
Epsom salts
4 tablespoons
Water and/or Apple Juice
3 cups
Olive oil
1/2 cup
Fresh pink/red grapefruit
1 large or 2 small, 2/3 cup juice.
Plastic straw
For drinking the olive oil and grapefruit mixture.
Pint jar with lid
1 jar
Black Walnut, Wormwood Tincture
4 eye droppers full (about 15 drops)
The weekend or any 2 day period you have free is best for this flush. On the first day of the flush, start your day as normal except only have maybe some apple cider for breakfast. For sure you do not want to eat anything with fat in it because you are trying to build up bile pressure. Drinking water throughout the day is encouraged as you don’t want to become dehydrated when your body starts to evacuate.
During the day you will want to prepare your epsom salts solution so that you can cool it down to make it a more tolerable drink. Combine 4 Tablespoons of epsom salts with 2 cups of warm water and 1 cup of apple juice or cider. You can use all water or all juice if you like but make sure the ratio is 4 tablespoons epsom salts to 3 cups of liquid. Mix the liquid until the epsom salts are completely dissolved. Place this solution in the refrigerator at let it get really cold.
By 2:00 pm you will want to stop all consumption of any juices (or food) you may have been drinking. You are trying to flush out your intestines and eating food only hinders this process and can make you feel ill when you start the process.
At 6:00 pm drink 3/4 of a cup of the epsom salts solution you prepared earlier in the day. There is nothing really that will completely kill the taste of epsom salts at this concentration so you are just going to have to buck up and drink it. Try to drink it within 10 to 15 min. After you have finished drinking the solution, you will want to get the olive oil and grapefruit out to allow them to warm up to room temperature.
At 8:00 pm drink another 3/4 of a cup of the epsom salts solution. After finishing off this drink you are going to want to prepare the olive oil and grapefruit drink. Pour 1/2 cup olive oil into your jar. You can add 2 drops of oregano oil if you are also looking to flush out yeast from your body but this is optional. Wash grapefruit twice in hot water and dry. Squeeze the fruit and remove any pulp from the juice. You should get at least 1/2 cup but you are really looking for 3/4 cup of juice. If you don’t make it to 3/4 of a cup top the juice off with some lemon juice. Add the juice as well as your black walnut and wormwood tincture to the olive oil. Close the jar tightly with the lid and shake hard until it emulsifies.
At 10:00 pm (notice the 2 hour intervals.. you can adjust to your schedule but make sure you leave plenty of lead time where you do not eat) drink the olive oil and grapefruit juice drink. You can take some melatonin or ornithine if you think you will have trouble sleeping. I suggest using a straw, placing the tip as far back in your mouth as possible, to drink the olive oil and grapefruit quickly. Try to get it down within 5 minutes.
As soon as you are finished go to bed and lie down flat on your back for at least 20 minutes to half an hour. Don’t get up just stay in bed and go to sleep.
On the second day of your flush (at least 8-9 hours after you drank the olive oil) in the morning drink 3/4 cup of your epsom salts solution. This will start your body flushing all the bile pebbles it has created as well as any gallstones that have been flushed out. Take this morning easy or go back to bed and rest.
2 hours after your first morning epsom salts take the last 3/4 of a cup of the solution congratulating yourself on finishing off 3 cups of that nasty tasting solution. The solution should run right through you and allow for your final voiding of bile pebbles and gallstones. If you intestines were relatively clear (they should have been) all you will see are these bile pebbles and gallstones. Most of the bile pebbles were created during the night when your liver and gallbladder shot out bile to deal with the 1/2 cup of oil you drank. Some of the pebbles will look different, they will be yellow or look harder. These are most likely real stones you have flushed from your gallbladder and hepatic duct system.
2 hours after your last epsom salts drink you can start eating again. At this point you may not feel like you need to eat and you could fast for the rest of your life. That well may be true but you should begin at least drinking water. To break your fast slowly start to add foods to what you are consuming. I suggest starting with juices as well as a good pro-biotic. Move your way up to unsweetened yogurt with active live cultures. You have just flushed most of the good, bad, and benign bacteria and yeast from your body. You will want to restore the good bacteria as soon as possible so that something else doesn’t take residence in your intestines. After your yogurt solid fruits are good to eat. Take it slow, your body needs time to readjust to eating again.
Congratulations you just finished a liver and gallbladder flush. You may feel the need to do this flush again but it is recommended that you wait at least 2 weeks between flushes. The more important thing to remember after your flush is that you want to keep your liver healthy by watching what you eat and limiting your exposure to toxins. This flush in not a cure it is merely a way to get a fresh start with your liver. The real cure will be a sustained effort to maintain a healthy lifestyle.
 Honey has a long history in human societies around the world. It is used in various foods and beverages as a sweetener and flavoring. What is more interesting is that it also has a role in religion and symbolism sometimes being called the nectar of the gods. It is also used in various medicinal traditions to treat ailments. In fact recent studies of honey have indicated that these traditional uses actually have scientific merit. Antibacterial properties of honey are the result of the low water activity causing osmosis, hydrogen peroxide effect, high acidity, and the antibacterial activity of methylglyoxal. Because of all of that honey makes an excellent face mask.
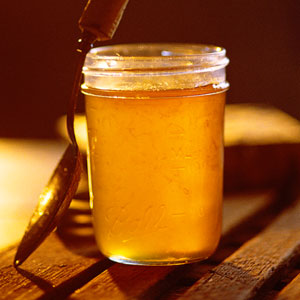 To get the most out of your honey mask, you will want to add an exfolient to the honey. I have always found that adding sugar to the honey is ideal because of the small size of the sugar grains and the fact that the sugar dissolves and washes away cleanly with just simple water. The ratio is up to you but a nice ratio of honey to sugar is 2-1. You want to wait to make the honey-sugar mix until you are ready to scrub your face as some of the sugar will dissolve in the honey if you put it in beforehand. Once you have scrubbed you face with the honey-sugar mix, let the honey sit on your face and go to work on your pours and any acne you might have. When you are done a simple wash of water will clean off the goopy mess and you will be left with a radient face.
 There are a lot of different things you can do with the various oils that are used in soap making. One of the easiest things is to turn a few of the best oils into an emulsion for a lip-balm or body moisturizer. The process really is simple and actually has fewer steps than making your own soap.